Friday, July 1, 2011

Post #38, 7/1/11 More New Parts Arrival

65 Mustang Restoration

 Well, I talked to Kristy at Laurel Mountain Mustang on Monday. She asked me to send some pics of the dented quarter & the box, which I did( I was late for work a bit), and when I got home, I saw her email saying that they were sending me out another quarter panel, with the request that I check it out immediately once it arrived. Sounded good and fair to me! 


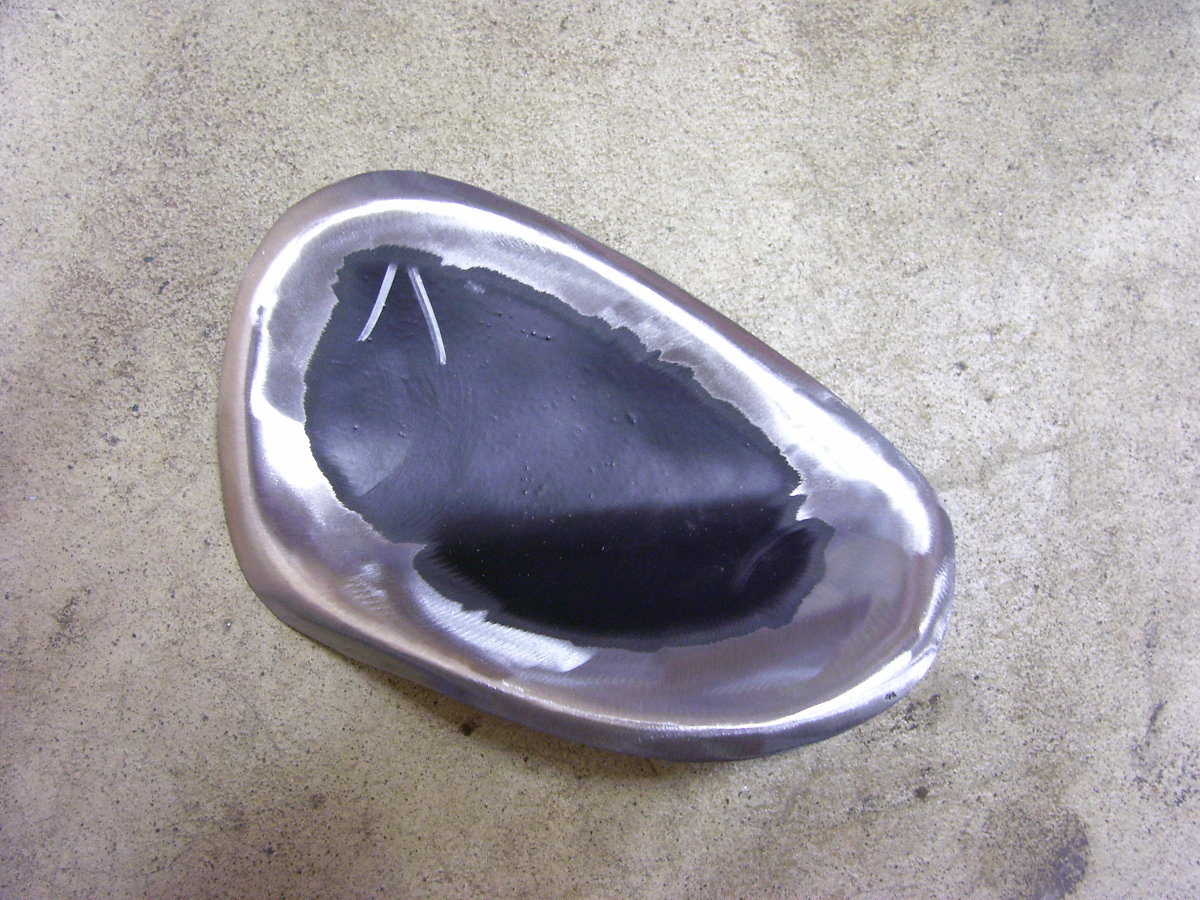
Pretty sad huh?  Luckily(Hopefully) the new quarter will arrive soon. I've been working so hard at work, that I just realized it was the 4th of July weekend coming up,,, yippie,,, 3-day weekend. It sure would have been nice to have had the new quarter panel arrive,, maybe yet tomorrow(Friday). 

Last time I stated that we just ordered a bunch of new parts, mostly all of the electrical items,,, they showed up today,,, pretty small box compared to the ton of money they cost. I hope I don't bore to many of you with the pics of the new parts,, but I don't know of a better way to prove/show the potential buyer of this car, what has all gone into it.

15 bills doesn't look like much huh? And that's with approx. $250 in savings & Free Shipping!  All of the parts came from CJ Pony.
 

  The wheel you see, is the new spare tire(it looks much better in person). My boss bought a set of these for his 65 coupe, and I just loved how great they looked on his car,,, I thought the size looked perfect,, this is a Magnum 500 wheel, with BFG 205/60/15 tires. My boss's spare didn't fit very well at all in his car, so before I go welding in the spate tire mounting bracket, I figured I had better get the proper tire/wheel so I could mount the bracket where it actually fit the best.


New tail light buckets, under dash wiring harness, seals,,,


New headlight & taillight harnesses, parking & backup light kits, taillight bezels/lenses, Petronix II electronic ignition & flame thrower coil, and more wiring,,,


More wiring, sending units, headlight switch, bulbs, etc,,,
 
More switches, special screws/nuts, grommets, seals & wiring.

These are some other parts from CJ, Laurel, NPD & ebay,,,


New Grill,,,, I wish my name was Scott Drake!


MSD wires, pair of quarter panel ornaments, door strikers, and hood emblem,,,
 
Heater motor(2-speed) & fan(NPD), and parking brake assembly, and all the bits for the trunk lid lock.

I actually have a couple more decent size orders on their way from CJ & Eastwood,, hopefully they'll all show up soon, along with the quarter panel. We're hoping to get some bits & pieces done this weekend,, depending on the weather(heat) & what else all shows up in the mail.

Till next time,,, 

Monday, June 27, 2011

Post #37, 6/27/11 LR Quarter Install

65 Mustang Restoration

Well, the LR Quarter panel is finally all welded into place. It takes quite a bit of time to get all of the seams to sit flat against each other so all of the welds come out properly,,, overall, it was about a 6 hour process. The wife say's it's finally starting to look like a car again!


It took a bit of teamwork for Brent & myself to get the roof area all welded back to the quarter. This is a bit of a process since the quarter first has to be welded to the roof's inner structure,, then the welds have to be ground down,,, then the roof's outer skin can be attached to the quarter. If you noticed in previous pictures,, the outer roof skin was in pretty ruff condition, due to all that had to be done to remove the original quarter(which had been done before we received the car). But, with Brent holding the skin in place & with me tacking away, it actually wasn't too bad of a job. Once we had it tacked in place, I'd weld up an inch & then Brent would hit the area with a cold wet rag,,, which helps to keep the metal from warping,,,, actually, wetting it down, helped to shrink the metal back into place.
 

Another area that takes a bit of time to line up properly, is the door jam. I was surprised at how easily & well everything lined up,,, and I am very happy with how it turned out. Once the final adjustment of the door is done, it should be great,,, way better than expectations!


Here you can see that we also got the rear panel also half welded in(welded along the bottom up the the gas cap area). The LR lower drip rail corner was also completely welded into place. It's amazing how all of those wobbly sheet metal parts are now so stout.

 You can see that we still have to weld in the rear bumper-to-floor support brackets, but they'll have to wait until the other quarter in installed. 

Now we have to spend a bit of time to get all of the spot welds ground down & blended in. Once that's done, we'll put some very heavy coats on Rust Encapsulator in all of the freshly welded seamed areas to keep the rust away,,, followed by some more seam sealer, and eventually, more of the sound deadner. 
FYI  TIP:
Regaurdless how big of a pain in the rear or time consuming it is,,,, whenever you get in a shipment of any type of sheet metal(no matter what type of a truck it shows up on,, UPS, Fed Ex, USPS, and especially truck freight), always, always, always check it out and make sure it has arrived in good condition, AND, that it's actually the right part(the one you ordered). 

Why,,, well when we were about to get started in on the RR quarter this weekend,,, I way unpleasently surprised the find a huge dent/crease( and I do mean Huge) in the quarter once we removed the shipping box. Crap, wasn't quite the word that I used,,,, . My heart just sank,,, I was totally bummed out and all I could think was,,, crap, there's another 3 bills down the drain. 

But Then,,,, I think I may have lucked out(I guess I'll find out on Monday when I call LM), Once I figured out there wasn't much I could do about it right then, I figured I'd still try to see how well the quarter might line up with everything. But something wasn't right, it just seemed a bit off, especially where the quarter should line up with the roof,,, so to confirm my suspicions I grabbed the box it came in & checked the label & in big bold letters it said,, "RH Convertible",,, they sent me the wrong part,,, actually they sent me a very dented wrong part. So since the messed up the order,,, I assume they should be willing to fix it,, I hope!

So instead of sitting around,, we decided to go through all of the boxes of spare & small parts,,, figuring out what all needed to be replaced, what we still needed, what items can be sand blasted or cleaned up,,, might as well get some other items prepped for repair or paint.

Oh yeah,, we also just ordered ALL of the new Wiring for the car. All new harnesses, parking, backup, and tail light kits, radio,,, etc,,, just about every electrical item we'll be needing,,, that should be in this week.

Till next time,,,, 


Tuesday, June 14, 2011

Post #36, 6/14/11 Trunk Mods & Install

65 Mustang Restoration

Now that the quarters are pretty well prepped, it was time to concentrate on the trunk floor pans. And even though they've already been fitted into place,, there was still much work to be done.


Before we removed the pans, from below,,, we traced along the outside edge of the new frame rails so when the pans were removed, we'd know exactly where to drill our spot weld holes,, and once they were drilled, we then were able to remove a minimal amount of the black coating on the pans & the coating that remained, was prepped for the final coatings that'll be applied once everything is welded in place. 


Once the pans were removed, we realized that we hadn't completely weld in the rear cross member, so we did that first,,, then we cleaned everything up good,,, but we still had a bit of work to do.


 Once all of the spot weld holes were drilled, we set the pans back into place and noticed that the lips on the frame rails weren't completely level with the bottom of the pans, so we removed the pans once again & grabbed a straight edge/level and place it across all four of the frame rail lips. As you can see, they weren't all level and flat, so we took a few minutes & got them all positioned so that they were. But guess what,, just a couple more things to do first before their final install. 


So,,, what do we see in this picture? A couples of things actually. First, you may notice that the RR pre-assembled wheelhouse didn't come with the proper dent on the inside lower corner/curve. This dent is only important to have if you're planning on hauling a spare tire in the proper location, which we are planning to do. Luckily, one of the 4 separate wheelhouse pieces, previously bought, did come with the proper dent in it,,, now we just had to figure out how to transfer a dent. Yippeeeee!

Secondly,,, if you look at the inside of the frame rail towards the top, you'll notice a yellow-green color,,, that's because, before we planned on sealing up the top of the frame rail, we wanted to make sure that we coated the entire inside of the rails, all of the way down to the back seat area. We were able to do this with Eastwood's, Internal Frame Coating. It's designed to coat the inside of frames & other areas that you can't normally get to. These cans come with a special hose attached to them with a Spray Nozzle that sprays in several different directions all at once.  You just spray a BUNCH of the coating, til it starts running out of all of the holes on the bottom. Not only did we spray the rear frame rails, but we also did both of the front frame rails & both of the rocker panels. We had previously cleaned them up as much as we could & then just before coating, we blew them out for the last time.


Getting back to the dent, you can see here that we've cut out the dent from the extra panel. When lining up where cut out a hole in the good wheelhouse, it's best to do this from the underside of the wheelhouse. I was actually surprised at how well it lined up. We traced around it & cut out the hole(smaller than the lines we drew, you can always make the hole bigger). 
 

And here's the new dent installed,,, it actually wasn't to hard of a job, just time consuming,,, I was glad that we did it before installing the floor pan though. Here we've also set the pan back into place,,, you can see the spot weld holes. Now we're finally ready to install them.


The trunk pans are finally installed. Once all of the welds were ground down, we once again used Eastwood's Satin Black Rust Encapsulator to cover up all of the metal(except where more welding is to be done). Once it dried, we sealed up all of the edges with Eastwood's Seam Sealer. 


 We used Eastwood's Silver Rust Encapsulator in this area for a couple of reasons,,, but mainly because it makes it a lot easier to see in this area when installing the window & messing with the wiring, that'll have to be done down the road a bit.


We also welded in the tabs that help to mount the back seat side panels. This was simple & it lines up perfectly with the panel.


Once all of the coatings were dry, we then added the Fat Mat to the outer portion of the wheelhouse.
 
Remember that new steering wheel, well I ordered a Super Nice Black Leather Wrap called a "Wheel Skin" that I bought on ebay,, and the other night while watching TV, I spent about an hour & hand sewed the cover onto the wheel. What a Nice item! I have big hands and the factory wheel is pretty small in diameter making it harder to grip,,, this leather wrap made a big difference, the wrap is very secure feeling, it's added some thickness to the wheel, and it looks extremely nice! I also bought a new horn spring & installed the extremely nice factory horn cover that I also bought on ebay. I actually bought several of them, until this nice one arrived,,, I'd rate it a 9-9 1/2 out of 10,,, it's really nice.

I think that's all for this week,,, next step is to hopefully install the quarter panel for good,,, hopefully.

Till then,,,,