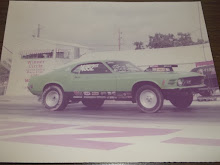
65 Mustang Restoration
Now that we got the partial car back, what's first? Well, last winter while looking for items on Ebay,, I came across a gentleman selling shock tower strengthening/repair plates,, thought those looked like a good addition to my car so I purchased a set of them. Now that the car is back in my hands for a bit, it's time to see if they're worth the time to install.
Since I already did a bit of repair & strengthening to a thin area of the tower, I figured why not make it a bunch stronger,, and if nothing else,, at least dirt & debris can no longer collect in that area. The plate was approx 1/8" thick & had a couple lumps on the ends,, so like usual, I decided to improve on the design a bit.
After it was all welded in, I buffed all of the loose stuff off with a brown roloc disc,,, then knocked off the loose paint with a wire bit in the drill & then repainted everything,,
And here's the finished product. Though you can't see it in these pics,, on the front of each tower inside the engine bay,, just below the plate I just welded in, I drilled a 1/2" hole which gave me access to the underside of that plate, and I used the special Eastwood flexible tube with a multi directional spray nozzle to coat that new cavern with some Encapsulator so it won't rust from the inside. I have new rubber solid grommets to plug the 1/2" holes.
Now the real fun can commence!
-----------------------------------------------------------
Suspension Assembly Time
Before I go crazy installing everything, just wanted to make my work area a bit nicer to be able to work on the car in,, so we went & bought a nice 12' x 9' piece of cheap carpet ($45 at Menards) & rolled it out under the car so i don't have to roll around on the cold floor.
Here's a tip,, if you can afford to do a rebuild,, by all means, get one of these Awesome COMPLETE new bolt kits for your car. This one is the Chassis Bolt Kit,, and it comes with every bolt you will need. This is such a time saver, and it's just nice to have new bolts rather that old rusty 50 year old bolts. I got this one from CJ Pony,, the invoice says $380 regular bolt price,,, but the Package price is only $260,,, and I probably bought it during one of their 30% off sales.
I also bought their Body Bolt Kit & their Engine Bolt Kit,, I have over $600 in bolts,, but it's well worth it.
The first items to install, were the New stainless steel 3/8" fuel line & stainless brake lines. This installation required a new Clip Kit for all of the lines. You'd think this was an easy thing to do,, but when you've never done it before & it's been many years since you took it apart,,, I had no idea what went where. After several trips back to the computer (looking at all of my pics), I found a video on CJ Pony's sight for installing a new brake line, and it showed right where everything went.
The lines fit pretty well, but there is some tweeking needed, but overall, very nice.
Now it's time to get serious,,, here's a bunch of pics of the finished product. Putting it together is a cake-walk for me,, the time consuming part, is the cleaning, prepping, and painting part. Everything you see in these pics has been prepped in some way,, even the new tie rods have been cleaned & painted with Eastwood's Satin Diamond Clear (though you'd never know it by looking at them).
Notice the new & improved heavy duty lower cross member.
I rebuilt the steering control valve, and pretty much everything you see is brand new. And since I plan to run headers, installed an aftermarket steering control valve bracket which lowers the cylinder a bit.
And even though the springs are new,, another 3 hours went into stripping the chipping paint off of them & then re-coating them.
Another $550 was used just over 3 years ago to get the new upgraded CSRP Disc Brake Conversion. These are 4 piston calipers, and all of the things you need to make them work on your v8 spindles are included in their kit. They went together very easily,,, and yes, you're seeing correctly,, green calipers,,, that's just how they come, or at least they use to. As long as they work properly,, I'm happy,, my wheels aren't see through anyways.
I also upgraded the pads to some nice new Raybestos Brake Pads.
And again,, on the rear of the car,, Everything is new.
Isn't it pretty,, can't wait to drive it.
It's those little detail parts that you forget about.
The nice $.99 swimming noodle from Menards makes for a nice protector!
Well that was a fun couple of weeks,, wonder what will be next,, till then,
Cya!


