65 Mustang Restoration
Over the last couple of weeks it's been more of the same thing,, prep & install. I figured it was about time to wedge myself under my dash & finish installing the rest of the sound deadener. Since it takes me awhile to get situated under there, my wife assisted me by cutting pieces for me as I yelled out measurements,,, what a huge help she was!!
All of this sound deadener sure seems to make a difference in the sounds of the metal when you tap on it,,, I'm hoping this eliminates any possibilities for rattles.
Next, it was on to the doors,,, or should I say, door hinges. Years ago I purchased a greasable hinge pin kit, complete with roller bearings,,, and the special tool for installing the springs. We waited to install the springs until after we mounted the hinges to the doors.
These are the threaded Hinge Plates before being blasted & painted. Sorry,, for some odd reason, I forgot to take any pictures of the doors being mounted by themselves.
You have to take your time getting your doors adjusted, since the fenders & hood and gaps all depend on how the doors are set. This can be very time consuming,,, we taped the daylights out of all of the painted edges. We used paint sticks as shims to set the doors on in the lower jams & shorter single thickness sticks to set the rear gaps on the doors. Again,, you need 2 people minimum (3 is better) to do this job.
Once the doors were all set, I turned to the underside of the fenders. I scotch-brited them, cleaned them, taped up all of the painted areas, and then proceeded to undercoat them with Eastwood's Rubberized Undercoating,, 1 1/2 cans per fender at this stage,, with several layers on the bottom of the top portion of the fender,, this is to help prevent any little rocks from possibly being thrown up by the tires & denting the fender,, hopefully.
While these were drying,, I started scotch-briting the 4 fender splash shields. After cleaning them all up I coated the sides of the shields that face away from the tires with Encapsulator so they're protected(the tire sides will be undercoated). Once the dryed, I went ahead and installed the 2 smaller front shields into the fenders & then shot them with undercoating. I tried to seal up any gaps between the rubber seal & the fenders with undercoating (when possible,, for large gaps, use seam sealer).
Though I don't have pics of the small shields,, I do for the large shields,, before & after their installs,,, but first,,, we installed the fenders.
A little bit of tape works well for holding the doors shut.
And here we have the before & after shots of where the larger rear fender shields go & what they protect.
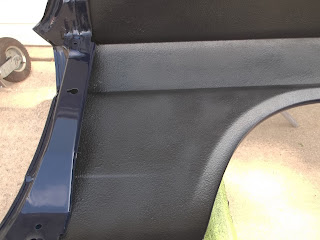
At this point, the shields are installed, but not coated yet. The shields look kind of dorky when they're on the work bench,, but you can see what a nice job they do sealing up the huge holes. I assume it'll take another 1 1/2 cans of undercoating for each side,,, but a bit of masking is in order first. Notice the 2 holes in the middle section of the lower picture,, those are for the push-pins that will hold the 1" thick firewall insulation pad that'll be install in the near future.
We also installed the hood hinges, and finished up sealing the rest of the front sheet metal,, all of those pesky gaps that we want to keep water & dirt from getting into.
Above,, I saw this sweet little trick on you tube. When we installed the fenders, we used our new star washer bolts which are very sharp & love to chew the daylights out of fresh paint. Since you may have to loosen & tighten those bolts many times during assembly,,, I drilled several 5/16"-3/8" holes into an old and empty antifreeze jug, then I used a scissors & cut several washers out of the jug. This has worked very well,,, since I have had to adjust the fenders several times. Once you're Positive that you're done adjusting,, just remove the washers one at a time,,, paint saved!
Some of the sealer,, nasty stuff! In the bottom picture,, that screw, screws into the fender shield to help keep them from twisting.
I talked with the Fitech EFI guys out in California the other day, & they suggested that for me it would be best to purchase a "Tanks" fuel tank that uses an in-tank electric fuel pump which I'll need to run their EFI system. This worked out great for me, cause 3 days later, my wife & I went up to the Good Guys Car Show in Des Moines, Iowa over the 4th of July weekend & besides seeing 4,500 cars,, we found "Yogis" out of Monticello, Iowa & they had these "Tanks" fuel tanks on display,,, so we got the "Show Special" and bought a tank, sending unit & fuel pump setup & received it on Tuesday the 7th. Nice looking tank & great service!
Since we're running an EFI system, besides running our 3/8" stainless fuel line,,, I also had to install a fuel Return Line. This worked out for me because I had previously purchased a different fuel line that was the smaller factory 5/16" size,, and though it would have been too small for my main fuel line,, it's perfect for a return line,, AND,, it's bent the same as the other 3/8" line,,,
The front of the line is positioned differently since the return line will run against the firewall.
You can see that I have the 2 lines temporarily zip-stripped together,, I just wanted to get the 2 main lines installed before too many other items are installed & in the way.
The 2 ends by the fuel tank will be modified at a later time.
And once all that fun was done,,, it was time to install the rear deck lid, and then,,
The hood and
the hood prop rod.
I don't know about you,, but I'm tired!
UPDATE !
Since this was posted,, we decided that before we sent it off for paint,,, it would be best to get the front emblems fitted to the car,, just in case there was a problem.
Since the plan is not to run the 289 emblems on the front fenders,, the only holes left to drill, are the 4 holes for the mirrors, & the 2 holes in the front fenders where the rocker panel trim pieces mount.
Till next time,, cya!


