Monday, October 3, 2011

Post #45, 10/3/11 Installing the Deck Lid, Fenders & Hood

65 Mustang Restoration

Well, we finally got a chance to get after most of the front end sheet metal work. Whoever said this was going to be the easy part, is really goofy!  Trying to line up all of the jams is enough to make one pull out all of their hair,, maybe I'm just too picky, but I don't know of any other way.

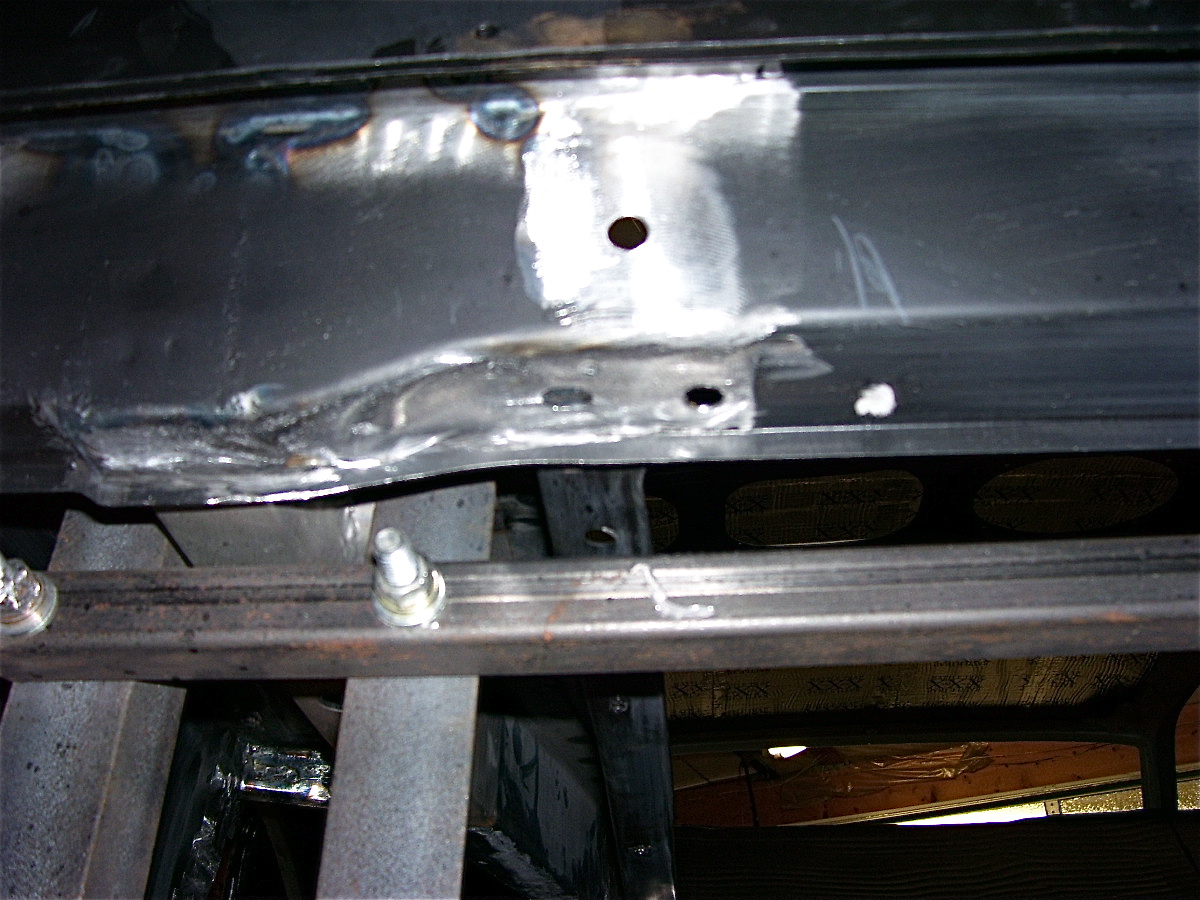
We started on the trunk area & installed the new deck lid that we got from CJP,, a nice looking Dynacorn part, however,,, it looks to have too much of an arch front-to-back,, and I don't see any way of correcting that without really screwing it up. I was able to acquire a real nice looking factory deck lid,,, think we're going to give it a try here real soon to see if that will work any better.


You can see the arch in the bottom pic the best,,, you may notice that the front of the deck lid still needs to be adjusted upward a small bit, which will make the center of the lid(on the side) line up even worse.


Next it was finally time to tackle the front end.
 

We started with the fenders, which actually didn't fit too badly,,, just a slight amount of tweeking to get them fitting properly,,, and most of that was in the headlight area. I'm still patting myself on the back for being smart enough to buy the Body Bolt Kit,,, oh thank goodness!!
 

The fenders, the hood, & the front valance were all purchased from CJP. I am Extremely happy with how well the hood seems to fit,, and the valance didn't fit too badly either,, just a very minor bit of tweeking. Though I really like the hood,, the bottom side glue spots are a bit on the sloppy side,, (see below), but other than that,, so far, so good.


Mustangs Unlimited had a nice price on the new Headlight Bucket Kits that I bought,,, I think I'm happy with them,, I'll know more latter on. I spent around 15 minutes on each one doing a bit of de-burring and reshaping a bit to get the parts to fit a bit better,,, even then they'll still be needing some body work to make their shape match the fender a bit better.


I had bought a new lower grill support from CJP,, but I didn't like how it didn't fit very well, so I robbed the one off my other "65 in waiting",, and it fit perfectly. Some times you just have to use oem parts if you want things to line up properly. I had 3 different stone guards to chose from,,, the one off of the car was actually in pretty good condition,, and since it's a factory part,, it fit pretty well. Both the stone guard panel & the grill support will be sent out to be blasted soon.  


Yes that is just an old used bumper,, the new one will be installed after paint.
 
  
We blasted an old set of hinges & coated them all up,, and then installed a new set of springs which we pretty much instantly removed, because they were waaaay too stiff,,, I was afraid of bending the new hood. We grabbed the old set of springs which worked a lot better,, we just have to blast them and make them all pretty now. Though all of those new bolts look great,,, can you see what I mean about the glue under the hood? I'll have to check with the body guys to see what they think.

I guess the next step is to see what the body guy wants me to do next,, he should be over to see the car real soon.

So, till then,,,,


Saturday, September 17, 2011

Post #44, 9/17/11 Coating the Engine Compartment

65 Mustang Restoration

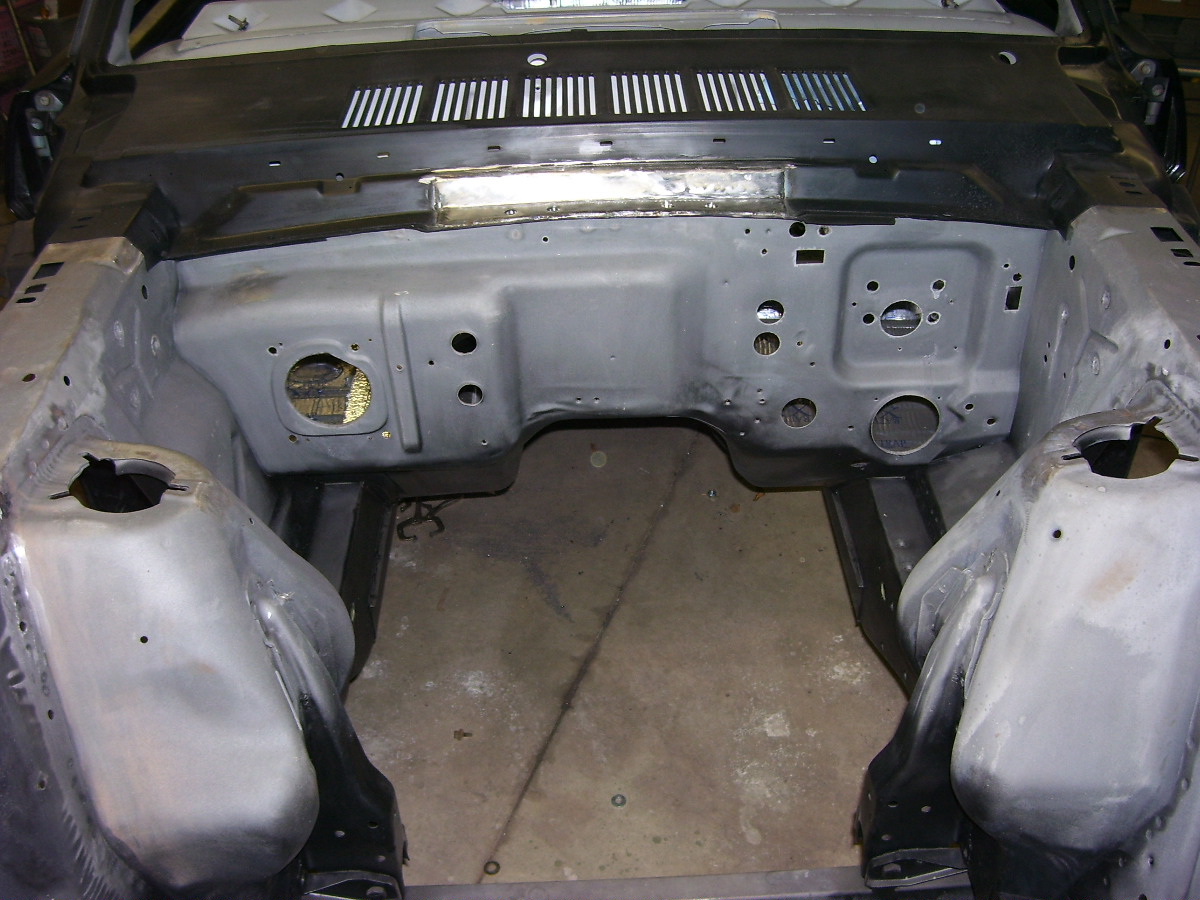
I figured it was finally time to address the engine compartment and get it all sealed(coated) up, so we did a bit more grinding, sanding, and the prepped all of the areas for their coatings. 


Since all of the metal work was already done in this area,, not to much prepping was needed to be done. The coatings from Eastwood sure seem to do a good job.


Now that she's all coated up, she looks real nice,,, the cars actually starting to look like something. Hopefully this weekend we can start hanging the front end, along with the rear deck lid.

Til then,,,


Thursday, September 15, 2011

Post #43, 9/15/11 Rear Support Mods


65 Mustang Restoration

 Busy, busy, busy,,, wow, it's been awhile,,, but we should be able to get back at it for awhile. A lot has happened over the last month,,, many new parts have arrived for the car,, including a Complete New interior for the car,, CJ Pony had another awesome sale that I couldn't pass up,,, end result,  $310 in savings and another large pile of parts taking up space in the house. We also acquired a freshly rebuilt "Autolite" stamped alternator(upped to 70 amps), a bunch of door parts for the up coming door trial builds, some new GT front springs & new upper control arms(show correct), and a Traction Lok posi unit for our 8" rear end,, which will be gone through completely some time in the future.  

And I sure don't want to forget the totally awesome new Chassis Bolt Kit ($223.00)(show correct),,, this is one of the coolest things I have gotten for the car,,, all of the different bolts/nuts/clips/whatever, are all in little Labeled baggies separated by where they go. I sure am glad I bought this kit,,, the decision was made much easier, since previously I had also bought the Body Bolt Kit,,, I'll easily have over 5 bills just in nuts/bolts/clips/etc,,,

As stated in the last post,, Brent & I had a seam sealing session a couple of weeks ago,,, getting nearly the entire rear section of the car completely sealed up,, including the wheelhouses. I thought it turned out quite well. Using a decent 1" wide brush dipped in "Eastwood's"  "Pre"(like lacquer thinner), (once a nice bead of sealer was applied to the car), we took our time and spread out the sealer. You want the brush wet, but not too wet,,, a bit of trial and error,,, but if you do it, start out on the dry side, it's easy to get the brush wetter. 

Last weekend I want to get the rear of the car pretty well wrapped up, metal-wise that is. And guess what,, more surprises. Remember,,, the back of this car was pretty well non existent when we got it, so I keep finding out as we go what small important parts I need to be able to reassemble this car. Here, it was the 2 little brackets that bolt to the rear frame support, which support the rear valance & the rear bumper guards. Luckily I had acquired a couple of sets of them amongst all of the lots of parts I've been getting on ebay. 

So, after finding some nice photos of how & where these brackets actually attach to the car,,, I found the appropriate clips & bolts & proceeded to bolt the brackets on. Hmmm, somethings missing! For some reason there are no holes in the rear support,,, crap! So, I want out & grabbed the old rear section of the car, and there I found the holes I was needing,,, so, measure, measure, measure,,, mark, mark, remeasure,, and finally, make some holes!  Actually, it wasn't that bad,,, just more time.

The left rear:


You can see the left side 2 bolts inside the trunk,, but the passenger side bolts are hidden.


The right rear:


 The large oval hole is needed to be able to install the clip.


If you look hard, you may notice that the clips go on the sheet metal on the passenger side, with the bolts going in from the rear,, this is done because there's very limited space to get to the bolts from the other side,,, like we were able to on the driver's side,,, mainly, because the gas tank is offset. It works out very well though.


Once the brackets were installed, then I was able to install the rear valance,,, the rear bumpers guards & an old rear bumper, along with the quarter panel extensions. Most of these are all just old parts that we'll be using for the mock up only, except for the valance. This may all seem pretty simple,, but it is very time consuming making sure how everything goes together,,, and that it all fits together properly.

One of my co-workers, the body guy,,, finally stopped over to check out the car,,, the last time he saw it, was when we picked the car up & it was all loaded up on the trailer. He said he couldn't believe what we've done so far, and that he told everyone when we got it that he doubted we'd ever get anything done,,, he has now taken that last statement back, and says he can wait to get started on the bodywork. So now the main goal for this year is to get the body completely mocked up, so we can get the body work done & hopefully get the car in paint before it's put to bed for the winter,,, so if anyone is bored & want's to help,,, come on over!

See ya soon,,,