65 Mustang Restoration
We started tonight with most of the small little sections of metal that needed repairing,,, most of which were easily welded up & then ground back into shape. Then will prepped & modified the two rear frame rails. When you receive them, they look like the manufacturer only did the bare minimum to get them out the door,, which leaves them pretty flimsy.
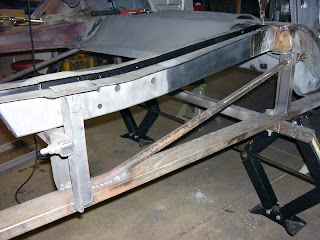
These are a couple of before & after pics of the welding that we did to the frame rails to strengthen them up a lot. We welded on them as much as space would allow, inside & out. During this process we also drilled holes & added the spacer tubes that will support the rear dual exhaust hangers, which were unfortunately, not done by the manufacturer. If you're replacing your rails, now is definitely the to do this step, because it will be impossible to do once they're installed,, even if you don't plan on using the holes now, you may want to sometime in the future. After all of the welding was completed, Brent re-blasted them and prepped them for the Rust Encapsulator treatment that they'll receive once they're installed.
Next, we installed the new RR frame rail,, I have to say,,, the jig worked out Great! I was amazed at how easily everything went together,,, just perfect. Once it was welded into place & the welds were smoothed down, we taped off the edges(for future welding purposes), coated the inside of the rail so it could dry over night, and called it a night.
Hopefully, the rest of the weekend build goes as easily as it did tonight,,,


No comments:
Post a Comment