65 Mustang Restoration
Now that the quarters are pretty well prepped, it was time to concentrate on the trunk floor pans. And even though they've already been fitted into place,, there was still much work to be done.


Before we removed the pans, from below,,, we traced along the outside edge of the new frame rails so when the pans were removed, we'd know exactly where to drill our spot weld holes,, and once they were drilled, we then were able to remove a minimal amount of the black coating on the pans & the coating that remained, was prepped for the final coatings that'll be applied once everything is welded in place.


Once the pans were removed, we realized that we hadn't completely weld in the rear cross member, so we did that first,,, then we cleaned everything up good,,, but we still had a bit of work to do.


Once all of the spot weld holes were drilled, we set the pans back into place and noticed that the lips on the frame rails weren't completely level with the bottom of the pans, so we removed the pans once again & grabbed a straight edge/level and place it across all four of the frame rail lips. As you can see, they weren't all level and flat, so we took a few minutes & got them all positioned so that they were. But guess what,, just a couple more things to do first before their final install.

So,,, what do we see in this picture? A couples of things actually. First, you may notice that the RR pre-assembled wheelhouse didn't come with the proper dent on the inside lower corner/curve. This dent is only important to have if you're planning on hauling a spare tire in the proper location, which we are planning to do. Luckily, one of the 4 separate wheelhouse pieces, previously bought, did come with the proper dent in it,,, now we just had to figure out how to transfer a dent. Yippeeeee!
Secondly,,, if you look at the inside of the frame rail towards the top, you'll notice a yellow-green color,,, that's because, before we planned on sealing up the top of the frame rail, we wanted to make sure that we coated the entire inside of the rails, all of the way down to the back seat area. We were able to do this with Eastwood's, Internal Frame Coating. It's designed to coat the inside of frames & other areas that you can't normally get to. These cans come with a special hose attached to them with a Spray Nozzle that sprays in several different directions all at once. You just spray a BUNCH of the coating, til it starts running out of all of the holes on the bottom. Not only did we spray the rear frame rails, but we also did both of the front frame rails & both of the rocker panels. We had previously cleaned them up as much as we could & then just before coating, we blew them out for the last time.
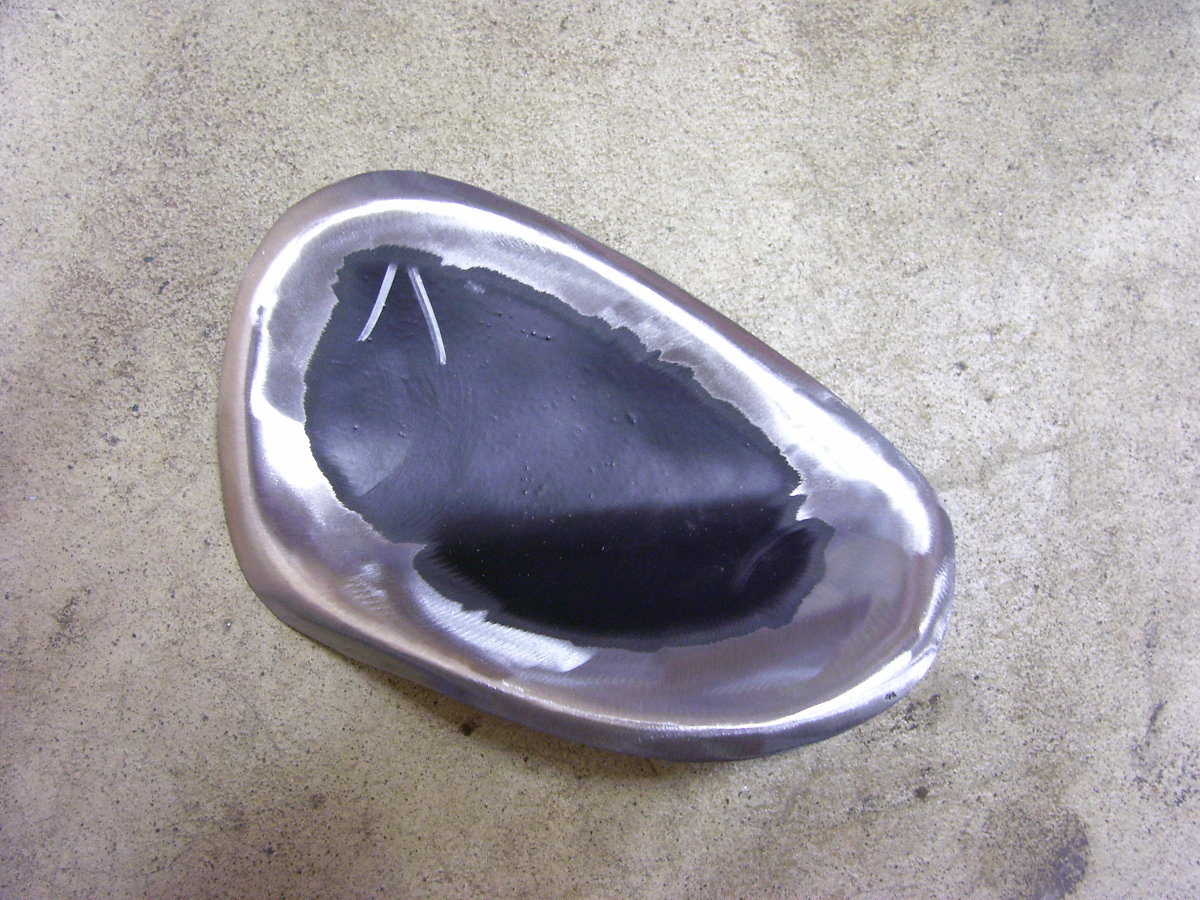
Getting back to the dent, you can see here that we've cut out the dent from the extra panel. When lining up where cut out a hole in the good wheelhouse, it's best to do this from the underside of the wheelhouse. I was actually surprised at how well it lined up. We traced around it & cut out the hole(smaller than the lines we drew, you can always make the hole bigger).

And here's the new dent installed,,, it actually wasn't to hard of a job, just time consuming,,, I was glad that we did it before installing the floor pan though. Here we've also set the pan back into place,,, you can see the spot weld holes. Now we're finally ready to install them.


The trunk pans are finally installed. Once all of the welds were ground down, we once again used Eastwood's Satin Black Rust Encapsulator to cover up all of the metal(except where more welding is to be done). Once it dried, we sealed up all of the edges with Eastwood's Seam Sealer.

We used Eastwood's Silver Rust Encapsulator in this area for a couple of reasons,,, but mainly because it makes it a lot easier to see in this area when installing the window & messing with the wiring, that'll have to be done down the road a bit.

We also welded in the tabs that help to mount the back seat side panels. This was simple & it lines up perfectly with the panel.


Once all of the coatings were dry, we then added the Fat Mat to the outer portion of the wheelhouse.

Remember that new steering wheel, well I ordered a Super Nice Black Leather Wrap called a "Wheel Skin" that I bought on ebay,, and the other night while watching TV, I spent about an hour & hand sewed the cover onto the wheel. What a Nice item! I have big hands and the factory wheel is pretty small in diameter making it harder to grip,,, this leather wrap made a big difference, the wrap is very secure feeling, it's added some thickness to the wheel, and it looks extremely nice! I also bought a new horn spring & installed the extremely nice factory horn cover that I also bought on ebay. I actually bought several of them, until this nice one arrived,,, I'd rate it a 9-9 1/2 out of 10,,, it's really nice.
I think that's all for this week,,, next step is to hopefully install the quarter panel for good,,, hopefully.
Till then,,,,

Very nice and that dent for the spare was great work. Looking good!
ReplyDeleteThanks,,, it's the little things in life,,, lol!
ReplyDelete