65 Mustang Restoration
Before we install the RR quarter panel, we decided we'd better figure out the whole rear quarter window situation, by which I mean, seeing if we have all of the parts it takes to install them,,, and seeing if we can actually figure out how it all goes together & how hard it'll be to install them once the quarters are both installed.

Here's the pile of parts that you need to install a rear quarter window,, this should be all of them, minus the new window seal & grease for all of the slides.

When I first decided to tackle this project, I had absolutely NO idea what parts I all needed & definitely No clue how it all went together, thank goodness for the guys on the Vintage Mustang Forum, they sent me a link with this photo, which sure made life a bunch easier! It showed all of the parts except for the little odd shaped L-bracket in the bottom right of the 1st picture,,, if you look hard you'll see it installed in photo #10.

Before we started we made sure that the window slide up & down in their tracks,, without binding,,, because we cleaned everything up previously, this wasn't a problem, even without the lube in the slides.

After removing the window, we then attached the (2) aluminum L-brackets(upper window stops).
This is the quarter window area on the inside of the car.

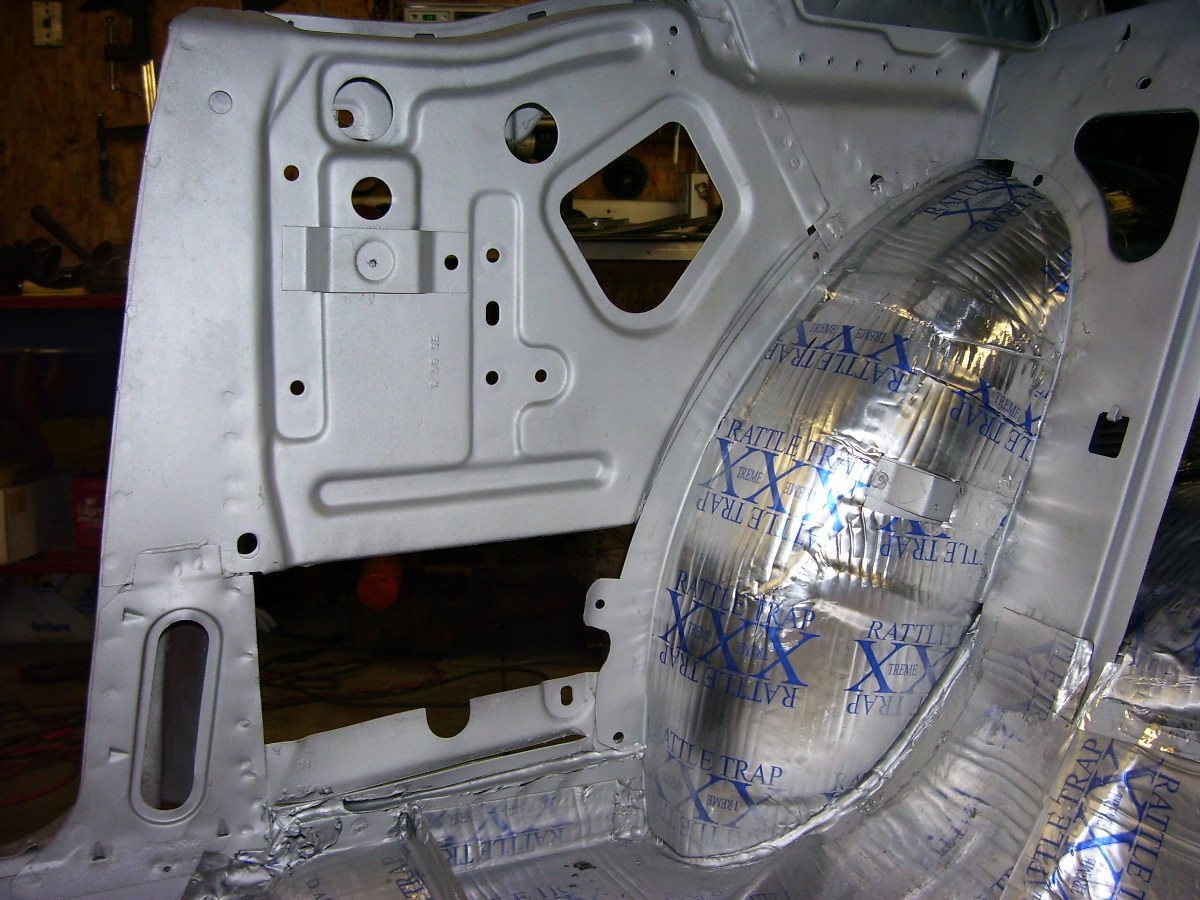
And here's what that area looks like from the outside of the car, without the quarter panel installed(normally you won't be able to see this view with your car),, just thought you might want to see it.

The first couple of items we installed were the window regulator & the L-shaped slide,,, just start all of the bolts before snugging them down. We also installed the bottom L-bracket(see photo #9)
NOTE: There are 2 different length bolts that mount the majority of all of the parts in this assembly,,, the longer bolts(I think there are 5 of them) are used in the areas where things are adjustable(3 in the bottom L-bracket, and 2 at the top where the large window slide plate attaches to the upper bracket of the car,,see photo #9),,, all of the shorter bolts hold everything else in place.

Next we installed the window,,, carefully lower it into the window opening & insert the regulator "roller" into the slide at the bottom of the window,,, this is easier with the regulator in the upper position.

Photo #9,,, here we slid in the large metal window slide/guide panel,,, this is a bit tricky, but not too bad,,, but since space is very limited in the upper window opening,, this is easiest with the window rolled all of the way down. This is where a "helper" is really nice and handy. You may also notice at the bottom,,, we placed tape over the all of the holes large enough gobble up any bolt that we might happen to drop,,, Cheap insurance from loosing a bolt in an area next to impossible to recover a bolt from.

Photo #10,,, In this pic(upper center), you can see the odd shaped L-bracket,, kind of looks like a sideways oil funnel when it's mounted in place,,, we come to figure out that this is also a "stop" that the regulator arm will hit against when the window is rolled all of the way up.

In this pic(from inside the car) you can see the regulator arm attached to the slide in the window,, also in the center,, you can see the lower window stop is also installed,,, you just roll the window up a bit to get to the 2 bolts that attach it to the large guide panel.

Just another view of everything installed,,, see the 3 bolts going up & down in the center of the picture,,, the dark center bolt is the one that attaches the odd shaped L-bracket.

Next, making sure that the large guide's 2 upper mounting bolts (Photo #9) are loose,,,, we rolled the window all of the way up and adjusted the gap between the back ledge of the window & the window ledge of the body(easily done by sliding the window forward or backward) when the gap is all even, hold it in place & have your helper snug up the 2 upper bolts,,, easy.

Next we adjusted how the top of the window sits/points. This is done with the Bottom L-bracket(photo #9),, loosen the bolts,, position,, tighten the bolts,,, vwola! DONE!!!

Once we removed the window assembly, we proceeded to install a bit more Fat Mat,,, as far as I'm concerned, you can't have too much,,, I can already tell a Huge difference in the sound of the car!

And lastly, we covered the inside of the RR quarter panel,,, and scotch-brighted it so the paint that will get applied latter will stick properly. Next on the program is to get the quarter mounted & welded into place.
Till then,,,,

Awesome!
ReplyDeleteplease help if possible. i need the quarter window Catalogues would really help and your advice would definitely help.
ReplyDelete