65 Mustang Restoration
Wow,, what a lot of grinding! Sorry I haven't done much reporting,,, but with only a limited amount of time, the 110+ degree weather, and a ton of grinding,,, there just wasn't a bunch to yap about. However, that doesn't mean I've been slacking in the ordering of new & used parts,,, several new orders are on their way. One of the sweet items that did show up last week was, a nice factory 1965 AC Evaporator unit, that looks to be in very good condition,, but we'll still be going through it,, more on that, later in the build.
Even before all of the grinding was done,, we decided to take a break and take care of the spare tire dilemma. When it was first set into place, it rocked all over the place,,, mainly due to the rear bumper support brace, which you can see, has now been modified to help with tire clearance. It's still very strong,, probably stronger than the stock one, since we drilled through the brace, then the floor pan & then were able to weld the brace directly to the new frame rail itself,, much stronger than just welding it to the tin floor pan.
Once that was welded into place,, we positioned the spare tire into it's new location, and marked the spot where the mounting bracket would need to be. We were able to reuse the factory bracket(since new ones aren't available yet) but since it was in great condition,,, it'll work out just fine. And instead of going through the center of the wheel,, the mounting bolt will actually go through one of the wheel's lug nut holes,, and we plan on using a chrome lug nut to hold it into place.
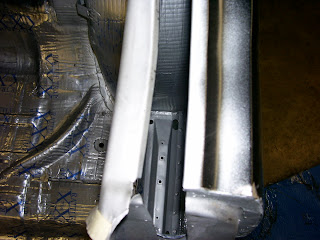
Once that was done,, along with the rest of the grinding,,, we cleaner her all up & coated everything with some more Rust Encapsulator. Before we finish off the sound mat installation, we will need to get all of the inner seam sealing done,, maybe next week. (once again,, sorry for the spots in the pics,, it's not the camera,, it's just particles floating around in the air, only visible to the camera)
The wheelhouses were also coated,,, and will also need some seam sealing done,, along with a layer of that rough looking black coating that also acts as another layer of sound deadening,,, like what came from the factory.
I still have to build a patch to cover that rectangular hole you see, since I want it to be covered better than with just seam sealer. You may also notice that we have added a light layer of "All Metal" to the wheelhouse/quarter panel lip,, just want it to look a bit nicer.
We also shot a coating of silver Encapsulator in both of the rear quarter window areas,, and will also be adding a bit more seam sealer along the bottom.
The guys from the body shop also wanted us to get the first layer of "All Metal" installed on the quarter panel seams. Even though it'll be a while be for we get that far,,, it will also keep that area from rusting up by sitting open in the humid air.
All for now,, I just have to see what shows up in the mail this week, and get ready for next weekend's seam sealing party.
Till then,,,,,


How does the AllMetal compare to lead or bondo as far as cracks showing up in the paint at the seams. I have to fill the seams on mine and it probably will be 1/2" thick in some places. I was going to use lead because it seemed less prone to craking at the seams vs bondo and would love to use something better.
ReplyDeletehttp://www.65fastbackrestomod.com/2010/06/quarter-panels-1.html
Thanks