65 Mustang Restoration
Once the cowl installation was completed, we spent several hours doing a bunch of touch-up grinding & sanding all over the car. The next item that we went to tackle was seeing how well the doors were going to fit & line up,, but when we dug them out of the shed, we found that the right side door, (which had previously been badly re-skinned by someone in the past), also had several small rusted through holes on the bottom of the inner shell. That isn't a place that you can repair due to the textured finish that is has, which is visible to everyone when it's installed,, plus, it was tweaked pretty badly.
Then we checked out the left door,, no rust, but unfortunately it had several dents on the inner shell,,, once again basically making it scrap metal. So I jumped online to see who had a killer deal on new door shells,,, and once again I guess I lucked out, because CJ Pony was having a 30% off sale on all sheet metal, and since they don't charge for shipping, we were able to get a pair of doors for only $200 each. But for some reason when they sent me the invoice for the order the next morning,,, they ended up only charging me $165 each (shipped),,,, Must be for my high volume discount,,, I know I wasn't going to argue with them.
By the end of the week the doors arrived,,, nice looking parts! We mounted the right side door & it fit pretty well,,, just a couple of tweaks and we were good. We mainly wanted to mount the door at this time, just to make sure that the door frame was still square with the world & that with all of the cutting & welding that we've done to this point, didn't affect the alignment of the body.
The next item we wanted to get in, was the RR wheelhouse. We had previously purchased all 4 individual wheelhouse halves, since this was much cheaper to do, since we have a good spot welder,,, Mistake! The inner sections were very nice & fit pretty well, but the outer sections weren't even close,, and I saw no way to get them to even come close to working properly,,, so back online I went,, and once again it was CJ Pony to the rescue with another sale,, so I ordered the RR wheelhouse for $137 shipped. It showed up the other day and looks to be a real nice part,,, it's just missing the indentation on the rear of the inner section, that I think is for spare tire clearance,,, but since the original inner panel I have has the indentation in it,,, I should easily be able to patch it in. Hopefully we'll try to put it in, in the next couple of weeks.
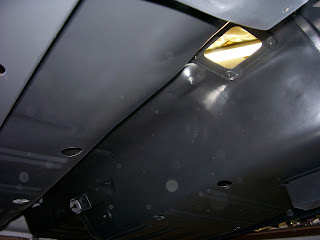
So while we were waiting for all of these new parts to arrive,, we did a little bit of body work to the underside of the new floor pans that we installed. We then hand sanded them & sprayed the with a couple of coats of satin black Rust Encapsulator, followed by a coat of Under Hood Satin Black, top coat paint. This stuff is pretty wicked, so you definitely want to wear a good respirator, goggles, and a hat. We were very pleased with the results.
Sorry about the pictures,, I didn't realize that there was dust in the lens. Once the paint dried over night, we seam sealed the underside of the floor. This is a very messy thing to do, along with, not an easy thing to do,, very hard to make the sealer look beautiful,,, but after seeing the mess the factory did on the original seam sealer,,, I guess I should be happy with how well it turned out.
Brent then cleaned & prepped the front end of the car so we could get it sealed & painted. We got most of it done, but we short 1 can of Encapsulator, so we'll have to finish it later.
Today we spent a bit of time getting the Strengthening Plate fitted to the cowl. This is the plate that the Shelby cars had added to them. It is welded to the front of the cowl and sits under the heavier duty, 1-piece style of Export Brace. I was fortunate enough to acquire a new heavy duty brace on Ebay. If you remember,, earlier we cut off the factory 2-piece export brace mounting tabs that were welded to the shock towers to make room for this much stronger style of brace. We mounted the brace up on the car, bolted it down, and welded the strengthening plate on,,, this came out real well,,, just have to finish grinding down the welds, which won't even be seen, since the outside edges all get covered with seam sealer.
It's amazing how many small details there are, when you build & enhance a car like this,,, but it's all of these small details that add up to make a super nice car, that goes above and beyond what the factory ever did to them.
Till next time,,,


No comments:
Post a Comment